A Mail Merge is a communication sent to more than one person.
To Create a Mail Mege
- Create a list of people to Mail Merge by using a Search and/or the Omit Records feature

- Click the Functions…. button at the top of the screen
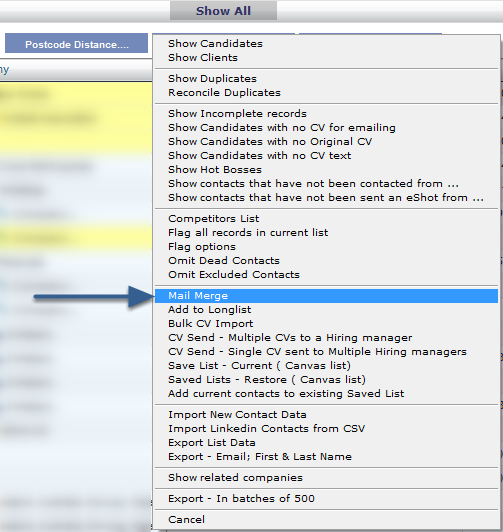
- Select Mail merge

- Click New

- Click Yes if you wish to included people marked as excluded from mail merges (last column in list view), otherwise click No

- Click Continue
- The Mail Merge popup window will open
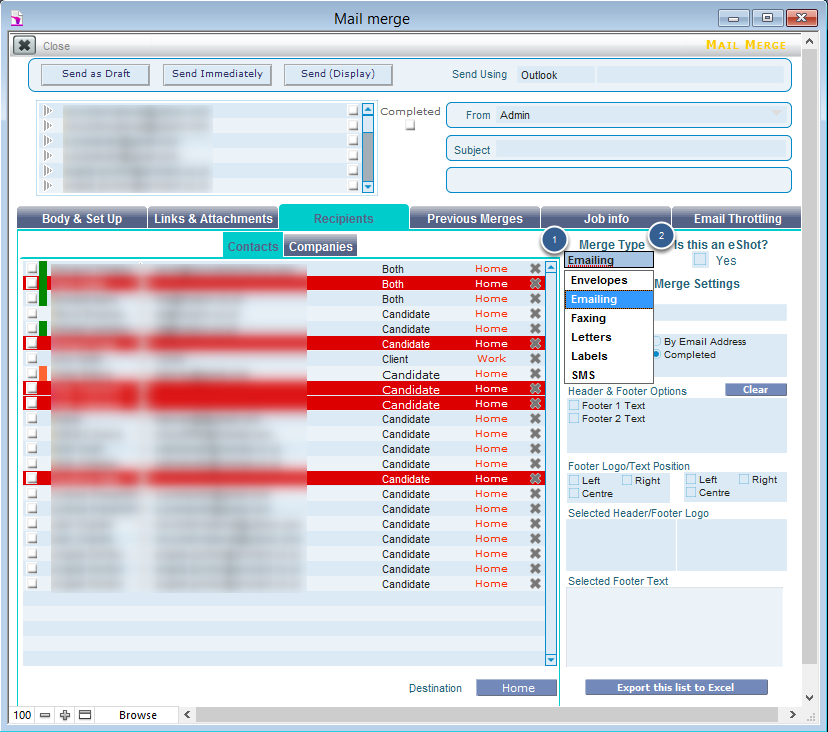
- Select the type of mail merge from the Mail Merge type drop down list
- If it is an eShot, check on the Yes checkbox (this will then populate the eShot date field with today’s date on the person’s Comms tab)
If the mail merge is linked to a job... (If not, skip to next step)

- Click the Job info tab and select a job to link it to
- Click to view the Jobs List and select the required job
If files need to be attached... (If not, skip to next step)

- Click the Links and Attachments tab
- Click the + in other attachments then select the files to attach
Add a Template or Body Text
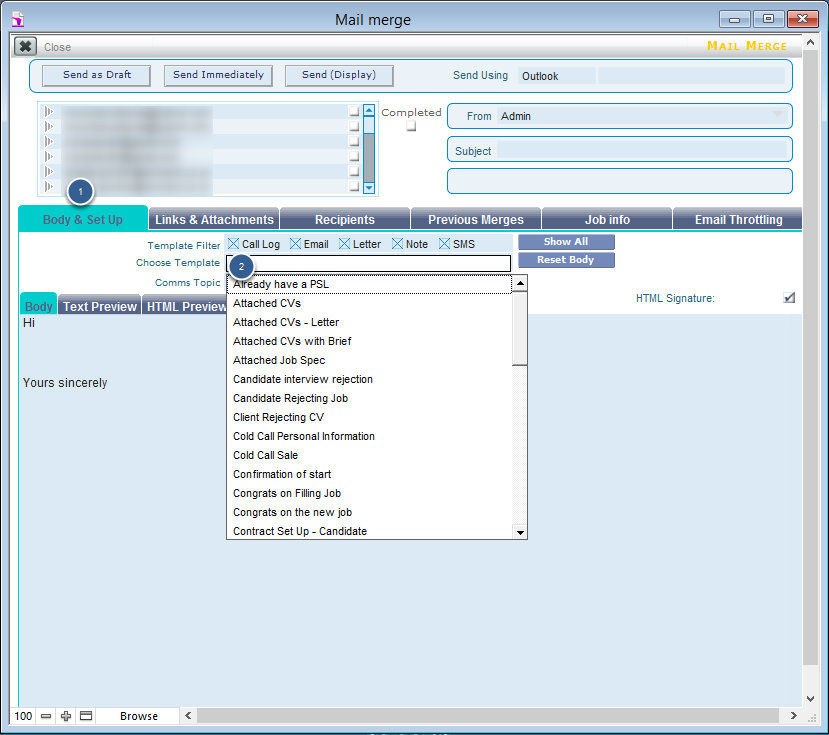
- Click the Body and Setup Tab
- Select a Template to use from the Choose Template dropdown field
Note: By default any email mail merges will be sent to the home email address.
To change an email address to Work/Home
- Click the Recipients Tab

- Click on the word Work in red to change to Home or vice versa
- Note: Any record coloured red indicates they do not have an email address stored against their record.
- To change all the records in one go, click the Home button next to the Destination field at the bottom of the list.
To delete a contact from the Mail Merge

- Click the grey cross at the end of the record
To send the Mail Merge

- Click the Send button at the top of the window
If emailing, the following dialogue box will appear:

- Click Continue
Note: All contacts in the list will be sent separate emails

- Click Yes or No as appropriate to create a To Do
0 Comments